Showing posts with label Design. Show all posts

Tuesday, May 01, 2018

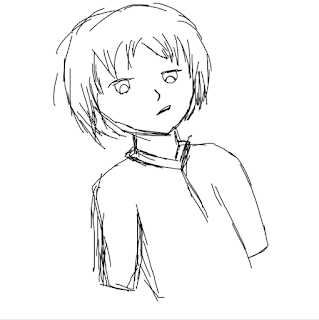
Egoistic Boy - Part 6 : Cloth remodeling, coloring and some improvement tutorial Paint tool SAI (Mouse user)

From last part we have done about some coloring for eyes, hair, and skin. Now we should continue to take body coloring and remodeling. 
For you who want to see previous step or part, just scroll to most bottom of the post. 

And here the destination of our tutorial, feel more life and smooth ^^

Saturday, April 14, 2018

Summer Girl - Painting in Paint tool SAI


Cute enough???

I  start to drawing this on last week, but stopped for 5 days because of other project. And at last, i finished this work. Total work 48 hours I think, because I need 24 hours just for sketch and lineart, i m not a pro yet.

With a warm, sweet and light color i draw this style. Thanks for all art that became my color specimen haha. But I hate when i must set the background to blurry ._ I was make a detailed background and it end up with a blur.. hiks..

Hope you all like this art so much.. see you on my next post ^^


Need a HD size?
http://fav.me/dc8s9e7

And for someone who want to see part by part and a non blur background.
https://www.pixiv.net/member_illust.php?mode=medium&illust_id=68228873

Thursday, April 12, 2018

Thursday, April 05, 2018

Egoistic Boy - Part 5 : Face and Eye coloring tutorial Paint tool SAI (Mouse user)

Hello everybody, brothers and sisters whereever you are. 

In last post i have write something about Hair coloring tutorial, shading and lighting Paint tool SAI (Mouse user), and then in this post we will jump to the next step. 

We will talk about Face and Eye coloring tutorial Paint tool SAI (Mouse user), so this post will explain how to drawing eye and some face shading.

This tutorial is just a basic tutorial, you can improve it with your own skill. I just shown you what should we do for get better result. 

And here is the result for this part of tutorial, just less than 1 hour to done this part. Yeah this is simplest part but important.

Thursday, March 22, 2018

Egoistic Boy - Part 4 : Hair coloring tutorial, shading and lighting Paint tool SAI (Mouse user)

Egoistic Boy - Part 4 : Hair coloring tutorial, shading and lighting Paint tool SAI (Mouse user) 

Hello guys... Last week we have done with base coloring tutorial. the result was good enough but still need more improve. In this tutorial we will talk about shading. 

Shading is an important thing to do, for a better art shading make art be more awesome. In Paint Tool SAI we should make our own shade with some tools. 
Here are the tools:
1. PC/Laptop/Notebook
2. Mouse
3. A cup of coffee
4. Large of love about your project <3

For information shading using mouse is harder than make it in manual or using pentab. But this is not an impossible case, just need some trick and it can be easier. Today quote is:

"We talk about mouse we think about line art, line art make our day be better"

To understand about this tutorial please read my last tutorial, the link is bottom of this page. 

Friday, March 16, 2018

Egoistic Boy - Part 3 : Base coloring tutorial and layer management Paint tool SAI (Mouse user)

Hello all,nice to meet you, we meet again in my project "Egoistic Boy". Links to all tutorial placed on bottom of this post. From last post we have make lineart of this work, in that tutorial we have done with curve and then let us jump to the next part of tutorial "Base coloring". 
Base coloring is an important step to determinate what will your art look like. In this part skill to manage and choosing color needed.

Some of new designer choose color with high contrast, they just put color from brigher or most top right color, but this is wrong. We should use our intuition to decide what color should used. That color brighter than shading and softer than lighting. 

In this work i use blue and green as base color. I dont use most top right color because it will be weird to see. Middle color is better to use.

Okay this is our final result on this tutorial.


Wednesday, March 14, 2018

Egoistic Boy - Part 2 : Create Line art and fix some line (Mouse User) Paint tool SAI

Hello.. welcome to my post, in this section i will continue my previous project Egoistic Boy project. From my first section we already create a hard sketch. And now we jump to the next step line art. 


FYI: This is my last drawing result.


Ok Let just start

Before starting to make line art, you should set the opacity at hard sketch layer to minimum. 


In this tutorial i set it to 36%. I think this is enough to get a better vision. Just do on your own.


Now the sketch will be more lighter and soft. That black pen become gray cause of little transparent. 


The preparation has just done now jump to the next step. Create a linework layer - clicking on the pen icon beside of new painting layer icon. 


Left Click - And then we get a new layer named linework1. The difference of the painting layer and linework layer are in the tools available. For linework, the layer specially used to create curve, line and modified line. But painting layer specialy for coloring, drawing, and blur.

You can see on picture below, to create a curve you should select on the curve tool. I used 5 px size of curve, you can use other size based on your object and canvas size.


Picture below show about curve test.
Left Click to create curve
Fast double click to end the line
Slow double click to make corner line

Egoistic Boy - Part 1 : Step by step sketch tutorial in Paint Tool SAI (Mouse user)

Egoistic Boy - Part 1 : Step by step sketch tutorial in Paint Tool SAI (Mouse user) - Hello guys, this time i will share to you about my little work with SAI. Paint tool SAI or better known as SAI is a program developed in japan. As we know Japan is the large source of artist, we talk about japan we think about manga, anime and some moe-moe games. 

Paint tool SAI made in japan for a digital drawing application, with some advantage and disadvantage. I will share this one next post.

In this section i will share about mw little work with SAI. I dont have enough proud about this art because i had just been started to learn since 2016, i have too many mess. But i hope this tutorial will help you much.

First at all you shoul have Paint tool SAI inatalled in your PC. And then just open it, next start to create a new file. If you do not have you can download from here.

Basic new file. Go to file - new in the menu bar to create a new canvas. 

I use a custom canvas size with 3000 x 3000 px and 300 dpi resolution. I am just enjoying with this resolution, you can decide your own to work. But 300 resolution is better for all design works. 

After creating new file you will have a look with blank white paper. 


Now focus on the left section, you will see some of icon. That icons are your drawing tools with different function. In this tutorial we need pen tool to draw the scetch. Other tools function will posted soon.

Look at picture below, I use pen tool with 5 px size. You can set your own pen tool size by dragging bar to right or select from the dot icon at bottom.


And then.. Lets try to draw something on the canvas, with pen tool you will get a strong line base on your density of course.

From my experience in using some mouses, mouse with higher sensitivity easier to use and get better sketch quality. I use 2400 dpi mouse and it great enough I think.

Try to make some creepy sketch first, or some people draw the skeleton first. It will be hard for first time. And then i made this zombie haha.

I used a gray color for this sketch. Just a first raw image from our mind, with more sketch's line should be better.


Now try to make a better sketch. First we should create a new painting layer. Click on icon in the picture.


With this new layer, you can draw more sketch for the second time. It will be easier because we just following our old lines.


For a better view we can set old layer to inactive. Just press on the eye icon and the eye will be hidden with your old sketch


And finally we are done with the sketch. For information, this sketch just a hard sketch or raw sketch. Dont too focused on this, sketch in mouse user just for helper in next step.

Some people hate to sketch using mouse, they make their sketch on the paper then scan and trace it. Just do at your own.


Enough for today, hope this simple tutorial be usefull, you can go to other tutorial by clicking link below.

Egoistic Boy project:


Wednesday, February 21, 2018

Download CamStudio 2.7.2. - a very light screen and audio recorder for windows 7/8/8.1/10

Download CamStudio - a very light screen and audio recorder for windows 7/8/8.1/10

Hasil gambar untuk camstudio

This is the most light screen and audio recorder. CamStudio "Free Desktop Recorder Streaming Video Software" thats hat they call them self, free screen recorder but the quality is very good. CamStudio was originally created by a company named RenderSoft.

CamStudio able to record all screen and audio activity in your computer then create industry standar AVI videos and using its built-in SWF Producer can turn those AVIs into lean, mean, bandwidth-friendly Streaming Flash videos (SWFs). 

Getting interested with this super light recorder? Just download it in the link below..

Download Joomla_3.8.5-Stable-Full_Package


Download Joomla_3.8.5-Stable-Full_Package

Gambar terkait

Hasil gambar untuk joomla 3 interface

Hasil gambar untuk joomla 3 interface

Hasil gambar untuk joomla 3 interface

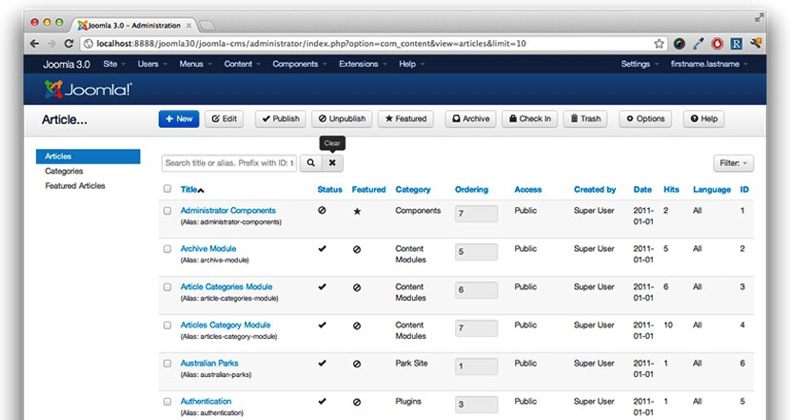
Joomla is one kind of CMS (Content Management Sytem) for website. CMS is program that construct from some programming language to help you on making and manage your website. With CMS you can create some themes, and write articles freely, this is just like an Operating System on you website.

Joomla first version born on 2005 and now lots of upgrade have been done by its developer. Joomla also a freeware that you can use and share it. Joomla is mobile friendly and user friendly CMS to create your website.

Here you can download Joomla version 3.8.5. Stable full version
GoogleDrive (13 mb)

Sunday, February 11, 2018

Paint Tool SAI Tutorial : Fanart serial Si Ocong (Webtoon)


Hello all... today I will make a post about design, oh not a design it will be more about drawing I think. So today we will use a popular drawing apps from Japan that named Paint tool SAI. As it name "Paint" so we will surely painting in the canvas, but it will not ruin your money to buy some ink because this is digital painting.

Now before you read the tutorial you must understand about how SAI works. So this tutorial will getting harder when you never use Paint tool SAI before.

Before start to painting, this is the tool used:
1. PC
2. Apps Paint tool SAI
3. Mouse
I use mouse here because i dont have pentab yet. So this tutorial is specially for mouse user, but pentab user also can learn from here.

Let's just begin, now we start to open Paint tool SAI application first and make a new canvas. Just make it on your own, but this is my comfort canvas as usual. Because I like to make a HD picture even my picture don't look well hahaha..

This is optional but Resolution 300 is absolute to give best result.


And now start to use Pen tool to draw the sketch from hard sketch. This is need intermediate skill  for using mouse. Just ganbatte ^^ Ita will be hard if this is your first.

Then this is the hard sketch, if you want a more beautifull draw just make the sketch be better.


Then draw on his face (eye, nose, mouth) in a different layer, because it will help you more while using eraser tool.


Next step is coloring the basic color, this can be picked from the example picture(for Fanart) or depend on your own. In this project I make some layer in same color. You can coloring that with pen tool, brush, marker, and other tool. In this case I just use pen tool and bucket.

This is detail of layer:
- Layer for hoodie (red)
- Layer for jacket (red same as hoodie)
- Layer for hair (gray)
- Layer for face (light brown)
- Layer for neck (light brown but darker than face)
- Layer for shirt (gray same as hair)


Next try to get the basic shading, create a new layer above each layer i said above and go to clip it. Then just give a simple shade with a dark color. Just imagine whats color should look like in the reality. And then give some blur to some angle.


Then give more shading with an extra clipping layer above the basic color layer and under the first shading. Use blur to make it smooth. Dont forget too add some detailed shading.


And now start to coloring the eye. The steps are first just go with a basic color.


Give it shade on the top, usually i use black color then i blur that black color. And this process is using a new  clipping layer above the basic color layer.

Just make a clipping layer above again and start to draw high light.


Then start to draw center of the eye.


At last just nonactivate the sketch layer, and you will get more elegant result. \._


Then just export it to jpg...

Si Ocong - Fanart by Me

Thanks for visiting. This is my original work with paint tool sai, I hope you understand about the presentation. If you want ask more information just write in comment or e-mail me.

And for bonus you can get the .sai file about this project by e-mail me (razifrizqullah@gmail.com). I am sorry to didnt share my work because a personal problem ^^ Just e-mail me i will give u soon.

See you on next post. ^^

Friday, February 09, 2018

Photoshop basic - Simple tutorial to rendering photo using photoshop

Hello guys, from east to the west, from north to the south and from hell to the heaven hahahaa.. now i will share to you about a simple trick to rendering photo using adobe photoshop. Whats is photoshop? I think you are know better about me but i will say something that photoshop is an application to editing, manipulating, creating, drawing, and many other thing about design. Yes, photoshop is an apllication that usefull on design graphic. But photoshop is not the only one application that can be used to design graphic you can so use Corel, Paint, or Other.
Back to the topic, i will show a little tutorial abaut rendering photos, but what is render? is it yummy to eat? hahaha not that.. render is an activity that you use your power in photoshop to crop some part to get the wanted part. And then this is the
step by step.

let's start >>
open photoshop (any version but the latest version recommended)


open the picture that you want to render


then look at the red circle, click on the lock syimbol in some version u must get it double click until the lock is gone.


next use CTRL+T to transform and get the best view to render.


now the war has just begin.. i mean the harder step
you can use some tolls to render it


Let me give some advise
1. Lasso tool - if you have a good talent on using mouse, just use this. This is the fastest one.
2. Polygonal Lasso tool - this the fast tool but you will get some corner on your render result
3. Magic wand tool - this is the fastest but with the worst result. You just clicking on the outer area and press delete and repeat it. Very very very unrecommended
4. Pen toll - if you are a person who like to work slow but with the best result use this. It will be better because you can edit on some node.

And now I use the first toll (Lasso tool) i just mark the outside - press delete - repeat

MARK

Press DEL

Repeat
And here the result

Hope this simple tutorial help you to rendering photos, thanks for visiting. Just comment if you have some question or some advise to my tutorial. See you next post ^^


Monday, September 07, 2015

Download Windows 7 Folder Background Changer (FBC)

How to change folder background image?


Boring with your Windows Explorer Background folder mage? now you can easily and quickly  change it. With Windows 7 FBC you able to change your folder background in same image on all folder or you can set it up on different image each folder, so you can customize your folder by yourself. Just install this application and you can change your folder background image with image or just change the color.

Features:
- Change background in all sub folder
- Change background in one folder only
- Give shadow under the name of file or folde
- Remove folder background

Download Link:
Windows 7 FBC

Sunday, September 06, 2015

How To Change Font On Windows 7/8/8.1

How To Change Font On Windows 7/8/8.1
Did you bored to your windows font? Always use the same font is make you bored. Now let me show to you how to change font on windows 7/8/8.1 easily.

Step by step:
  1. Go to desktop layout
  2. Right-click then click Personalize.
  3. Click menu Window color, And then click Advanced appearance settings..
  4. Then we will looked a new windows. select your font on options  font, Active Title Bar, Icon, Inactive Title Bar, Menu, Message Box, Palette Title, Selected Items, dan ToolTip.
  5. Click OK 


Now your windows font have been changed to your favorite fonts. you can select different font on options  font, Active Title Bar, Icon, Inactive Title Bar, Menu, Message Box, Palette Title, Selected Items, dan ToolTip. This is how to change windows font easily. 

Hope you like this..


Download Windows Movie Maker 6 Full Version for windows 7, 8, 8.1, 10

Download Windows Movie Maker 6 Full Version for windows 7, 8, 8.1, 10
Actually this program is windows XP software, but now its can used for windows 7/8/8.1/10, This application is unlike Movie Maker 2.6 because movie maker 2.6 have too many bug, but Windows Movie Maker 6 is safe from bug and add more effect. This application suppot for PC low specification.

Features:
- Effect
- Support all video format
- Easy split video
- Low RAM usage
- Make a video from multiple pictures
- ETC.

screenshoot:


Link Download Available Here..
Download Windows Movie Maker 6

Download Aegisub 3.2.2 full version latest

Download Aegisub 3.2.2 full version latest
Do you interested to become a subber? or want to know abaout subtitle? I will share to you an application that can used to subtitled all format video, that is Aegisub 3.2.2.
This some feature about latest Aegisub 3.2.2

- Translation Assistant
- Shift Times
- Style Manager
- Dummy Video
- Specialist subtitle format  *.ass
- Can export to format *.srt
- Can read format *.srt , *.ass , *.ssa , *txt, *sub, *.ttxt
- Can take subtitle from video format mastroka ( *.mkv)
and many other.


Screenshot:

you can download this application at here

PlatformInstall Type
Size
                         Windows 32-bit                             Full Install   
19MB
Windows 32-bit    Portable Version    
14MB
Windows 64-bitFull Install
20MB
Windows 64-bitPortable Version
15MB