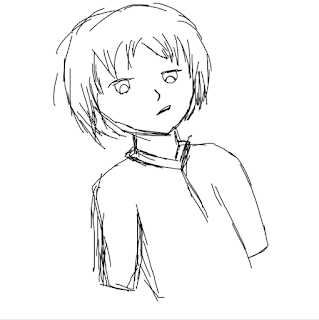
Hello.. welcome to my post, in this section i will continue my previous project Egoistic Boy project. From my first section we already create a hard sketch. And now we jump to the next step line art.
 |
FYI: This is my last drawing result.
Ok Let just start
Before starting to make line art, you should set the opacity at hard sketch layer to minimum.
In this tutorial i set it to 36%. I think this is enough to get a better vision. Just do on your own.
Now the sketch will be more lighter and soft. That black pen become gray cause of little transparent.
The preparation has just done now jump to the next step. Create a linework layer - clicking on the pen icon beside of new painting layer icon.
Left Click - And then we get a new layer named linework1. The difference of the painting layer and linework layer are in the tools available. For linework, the layer specially used to create curve, line and modified line. But painting layer specialy for coloring, drawing, and blur.
You can see on picture below, to create a curve you should select on the curve tool. I used 5 px size of curve, you can use other size based on your object and canvas size.
Picture below show about curve test.
Left Click to create curve
Fast double click to end the line
Slow double click to make corner line
tick tock tick tock.. Some curves and i just finished the body or cloth line..
And then i create lineart for hair. We do not need to follow our old sketch, just follow our new intuition and try make a better line.
Done! Hair line created, do a little modification to make it better.
And next we create a new linework to draw eye line. I decide to separate the body and hair with eye because it cen be easier to coloring in the next step.
Here is the result for eye, nose, ear, and mouth lineart. I use red line because it easier to look. Also i make a little modification in the neck and cheek.
To avoid being forget the lineart layer, just set a custom name to each layer. Double click on the layer and this window will be appear. Just change the name as your own.
At last we have done with the line art. Here is full result of my lineart from this step.
Next, i should recolor the eye line to black again and set the hard sketch layer to inactive for a better look.
If we need to change the line or curve, just hold CTRL to drag, Shift to bind drag, and ALT to delete the point or curve. For other SAI key combination, see on my next post about key combination Paint tool SAI.
Result:
Thanks for reading my little tutorial about how to make lineart in SAI. See you on next section. Post a comment to ask or anything.
Egoistic Boy project:
2. Line art


0 comments:
Post a Comment