Egoistic Boy - Part 4 : Hair coloring tutorial, shading and lighting Paint tool SAI (Mouse user)
Hello guys... Last week we have done with base coloring tutorial. the result was good enough but still need more improve. In this tutorial we will talk about shading.
Shading is an important thing to do, for a better art shading make art be more awesome. In Paint Tool SAI we should make our own shade with some tools.
Here are the tools:
1. PC/Laptop/Notebook
2. Mouse
3. A cup of coffee
4. Large of love about your project <3
For information shading using mouse is harder than make it in manual or using pentab. But this is not an impossible case, just need some trick and it can be easier. Today quote is:
"We talk about mouse we think about line art, line art make our day be better"
To understand about this tutorial please read my last tutorial, the link is bottom of this page.
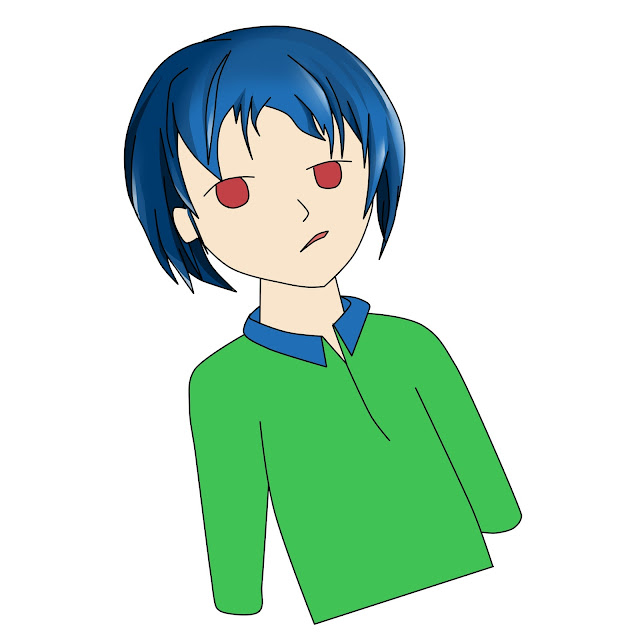
Here is result for a little spoiler ;)

Let's begin..
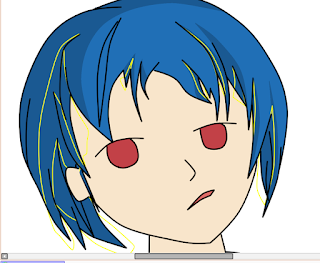
From our last work we have done with the base color. In this time we are focused on Hair section.
To draw shading we should make a new layer, just as usual.
And dont forget to drink your coffee ^^ this will be a little longer tutorial..

We do not want to draw shading at out of hair area or deleting the shading at outside. So by using clipping group it will help us so much. This tool will only show our layer based on the clipped layer or folder.
Check on the square beside clipping group and left side of your layer will marked as red line.

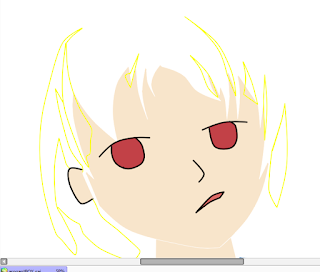
From our quote above, we use mouse user best weapon.. That is LINEART haha.
Why lineart? just try it and feel the sense, it will hundreds more easy than using pen tool manually.

Use curve tool.
And set the color to a bright color, this is helping to see the line. I almost use red, yellow, green. or blue. Depend on base color, just make this lineart in different color.

Also when we talk about shade, we will also think about light. We are drawing shade so it will in the opposite side of light.
In this art i use light from top right, we should not draw this sun, it okay if we can imagine that.

Time to make curve that covering our shade area. Make it in some rounds. This step need more feel and try.

And we are finish this section, our lineart have been ready to put color inside. But we need selection.

To give selection, i will give you a little trick to avoid some narrow white space. Tutorial about filling a narrow selection available on our last post about base color.
Use magic wand tool and then click outside to selecting outside area, see inside our lineart. If there are some area that selected, just look for the broken line. And then try to selecting again.


And then click reverse on top toolbar. This will make no white space inside our line art area.

And now a little trick about picking color for shading. I want to use 3 layers of shading, and start from the first. So this layer will be our first shading, dont make it too dark.
And also dont use bucket it will ruin our time, just use pen tool in a large scale. It will be faster step.

To make a shade color look more fit, it will efficient by using this tool.
Press CTRL+U and this window will spawn. Drag on the brightness section and some in saturation, just feel it and choose a perfect shading color.

We do not done yet with the first layer shading, some of little place need to be shaded too. You can using lineart as before, but i prefer to use pen tool. Use pen tool in same color as first shade, try to make a raw shade.

Then by using eraser tool delete some area to make our shade fit to the light.

And now we have done with our first shade, fyuuhhhh... *Take some coffee*

Then time to make second layer for shading. Make a layer above our first shade and use clipping group.
Dont forget to make a new layer for line art too.

As before make lineart to cover the shade area. I use a different color with first shading line art, it will help more in future modification.
If just our second shading layer in active, it will look like this one.
Look if there are some line off, fix it.
Different from before, in this coloring i will make my color to shade first. By using HSV color diagram, drag to left in few step in S and V to get darker color. This is just an example tutorial by using other step, i prefer to use CTRL+U to choose color.


Before apply the color as usual a selection needed. Use same instruction as first shading by using line art.

And use large scale of pen tool to coloring. Take a look and feel some error, then fix it.

I see some minus with my first shading so i go to fix it.

A little change on right side.

And also for my second shading, top left need more darker shade.

To make a live shade, gradation color needed in some case. I use it after second shading, a new layer below first shading.

Then try to use brush tool to make it. I use same color as first shade. But i feel make the first shade missing. And then i recolor the first shade to brighter than before.

There is a path at side of second shade, to make it smooth use blur tool.

And here the result after a little blur.

And last we have done with second shade. It look better for now, but we need more dark color to get a sharp shading.

Time to make a new layer and lineart layer above second shading.

With curve tool we make a lineart for third shade. In this part i use light green color.

Here the result of our lineart, dont make this third shade too many, just some on the right place.

By use pen tool time to put color on it. Use dark black to shade, it will make a better view for first impression.

We are creating something above other two other shade layer and one gradation, set the mode to multiply while shading with black color.
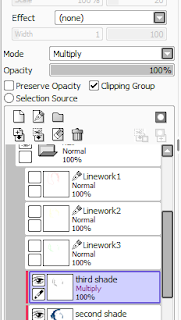
Press CTRL+U and drag brightness to right in few point to make a brighter shading.

And here we done with the third shading. But when we feel about a source of light above the character, it should be there is a light side on the hair.
Now continue to create the high light color.
Now continue to create the high light color.

For high light i use a white color and in multiply mode. Then turn the opacity to a bit lower (around 60% in pure white color).

For high light section i usually use pen tool and eraser tool, i think this is the easiest way. To think that we dont need many of lights.


And this is for a better result.
Hold CTRL and press on layer, that will create auto selection.
Delete a little space.

And by use blur tool blur this section without clearing the selection.
Done. Do this for all of the high light area.

Wow we have done with hair shading. Here is the result.
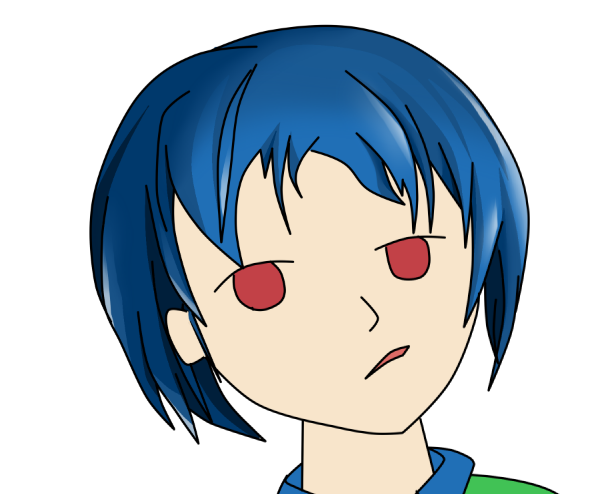
At last with some coffee and love we done this part. Thanks for viewing this simple tutorial, hope you like this. For some of my progress about this project, you can see on the link below.
See you agan in next post.. ^^
Egoistic Boy project:
2. Line art
0 comments:
Post a Comment